Home Resistor Testing Technology
Troubleshooting algorithm
Visual inspection
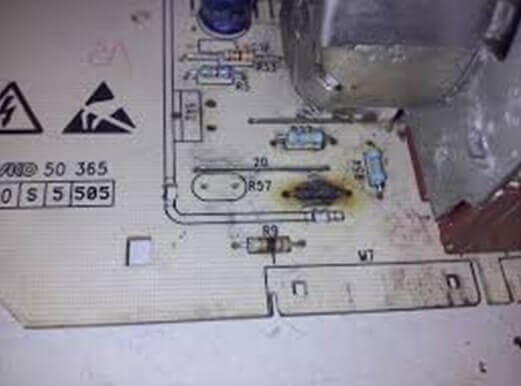
Any repair begins with an external inspection of the board. It is necessary to look through all the nodes without instruments and pay special attention to the yellowed, blackened parts and nodes with traces of soot or soot. With an external examination, a magnifying glass or microscope can help you if you are working with tight installation of SMD components. Torn parts can indicate not only a local problem, but also a problem in the binding elements of this part. For example, an exploded transistor could drag behind itself a couple of elements in the harness.
The area that is not always yellowed from the temperature on the board indicates the consequences of the burnout of the part. Sometimes this happens as a result of a long operation of the device, when checking all the details can be intact.
In addition to inspecting external defects and traces of burning, it is worth sniffing to check if there is an unpleasant smell like from burned rubber. If you find a blackened element - you need to check it. He may have one of three malfunctions:
- Cliff.
- Short circuit.
- Mismatch to face value.
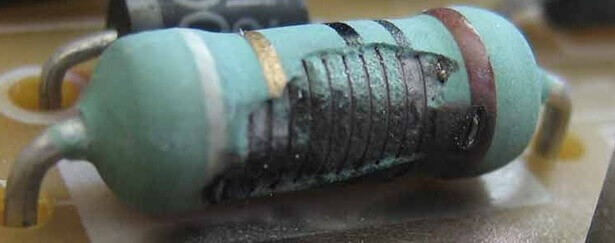
Sometimes the breakdown is so obvious that it can be determined without a multimeter, as in the example in the photo:
Open resistor test
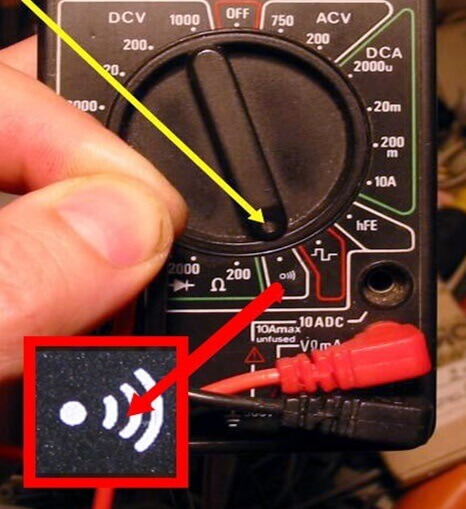
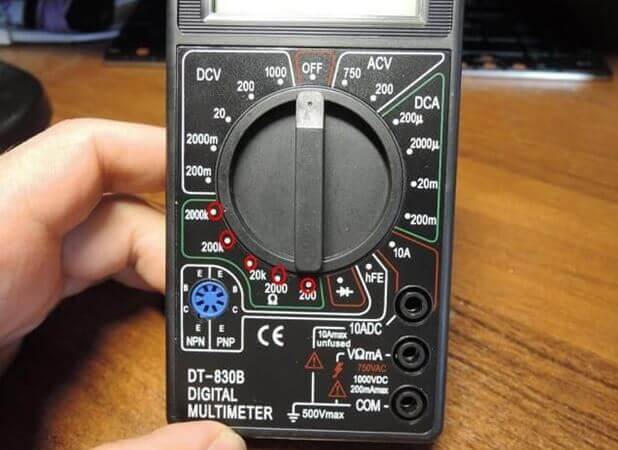
You can check the serviceability by a regular dialing or a tester in the diode test mode with an audio indication (see photo below). It is worth noting that the continuity can only check resistors with a resistance of units of Ohms - tens of ohms. And 100 kOhm will not be mastered by every proverb.
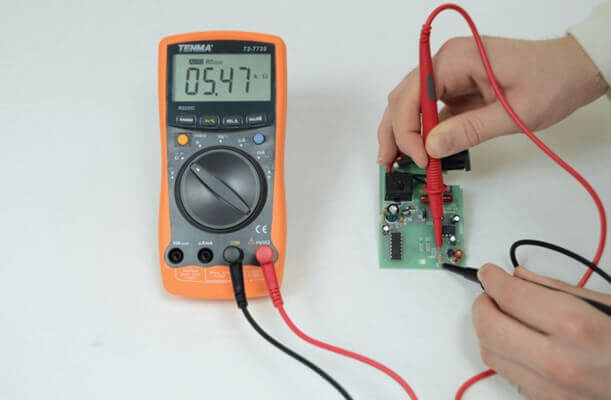
To check, you just need to connect both probes to the terminals of the resistor, it does not matter if it is an SMD component or output. A quick check can be carried out without soldering, after which nevertheless unsolder the suspicious elements and re-check for a break.
Attention! When checking the details without evaporating from the printed circuit board, be careful - parallel elements can mislead you. This is true both when checking without instruments, and when checking with a multimeter. Do not be lazy and better get out the suspicious part. So you can check only those resistors where you are sure that nothing is installed in parallel with them in the circuit.
Short circuit test
In addition to a break, the resistor could break through short. If you use a continuity, it should be low resistance, for example on an incandescent lamp. Becausehigh-resistance LED proverbs “ring” the circuit with resistance of tens of kOhm without significant changes in the brightness of the glow. Sound indicators cope better with this test than LEDs. By the frequency of feeding, you can judge the integrity of the circuit, in the first place by reliability are complex measuring instruments, such as a multimeter and an ohmmeter.
Check for short circuit is carried out in one way, we will consider the instructions step by step:
- Measure the circuit area with an ohmmeter, a continuity test, or another device.
- If its resistance tends to zero and the continuity indicates a short circuit, the suspicious element is evaporated.
- Check the section of the circuit already without an element, if the short circuit is gone - you have found a malfunction, if not - solder neighboring ones until it goes away.
- The remaining elements are mounted back, after which the short circuit is replaced.
- Check the results of work for a short circuit.
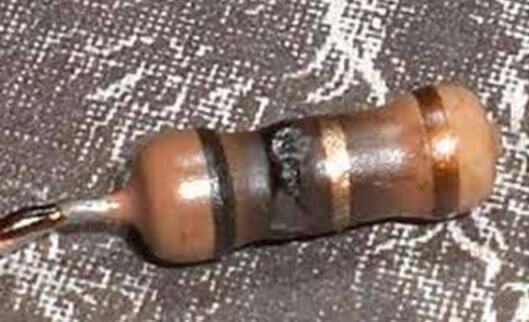
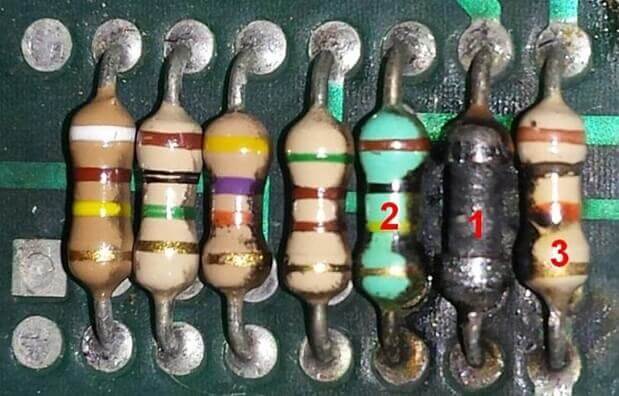
Here is a good example of a burned-out resistor leaving traces on neighboring resistors, it is likely that they are damaged:
The resistor turned black from high temperature, not only traces of burning, but also traces of overheated paint are visible on neighboring elements, its color changed, part of the conductive resistive layer could be damaged.
The video below clearly shows how to check the resistor with a multimeter:
Determine the value of the resistor
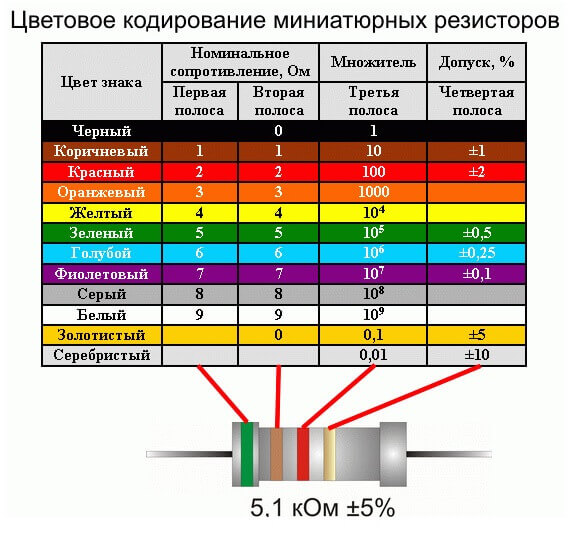
For Soviet resistance, the denomination was indicated in alphanumeric way. For modern output resistors, the value is encrypted in color bars. To replace the resistance after checking for serviceability, you need to decipher the marking of the burned out.
To determine the marking by colored stripes, there are a lot of free applications for android. Previously used tables and special devices.
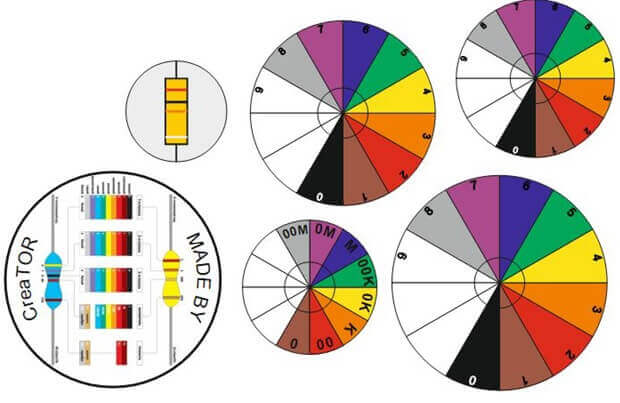
You can make such a cheat sheet for checking:
Cut the colored circles, puncture them in the center and connect the largest one back, the smallest one in front. Combining circles, you determine the resistance of the element.
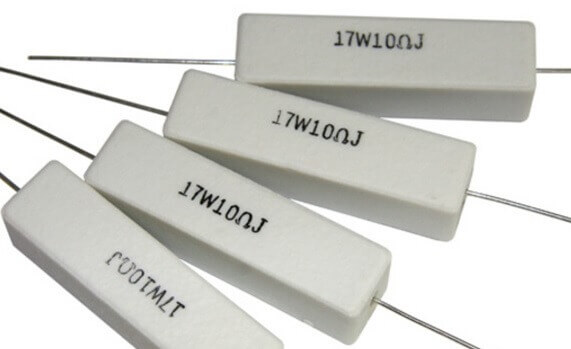
By the way, modern ceramic resistors also use explicit marking indicating the resistance and power of the element.
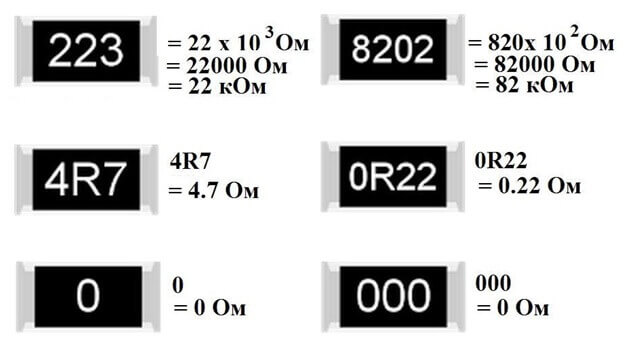
If we talk about SMD elements - everything is quite simple here. Suppose marking "123":
12 * 103 = 12000 Ohm = 12 kOhm
There are other markings of 1, 2, 3 and 4 characters.
If the part burns so that the marking is not visible at all, it is worth trying to rub it with your finger or eraser, if this does not help, we have three options:
- Searching on an electrical circuit diagram.
- In some schemes, there are several identical circuits, in which case you can check the rating of the part on the adjacent cascade. Example: pull-up resistors on buttons on microcontrollers, limiting resistance of indicators.
- Measure the resistance of the surviving area.
There is nothing to add about the first two methods, let's find out how to check the resistance of a burned-out resistor.
To begin with, you need to clean the coating of the part. After that, turn on the resistance measurement mode on the multimeter, it is usually labeled “Ohm” or “Ω”.
If you are lucky and burned off the area directly near the output, just measure the resistance at the ends of the resistive layer.
In the example, as in the photo, you can measure the resistance of the resistive layer or determine by the color of the marking strips, here they are not covered with soot - a good combination of circumstances.
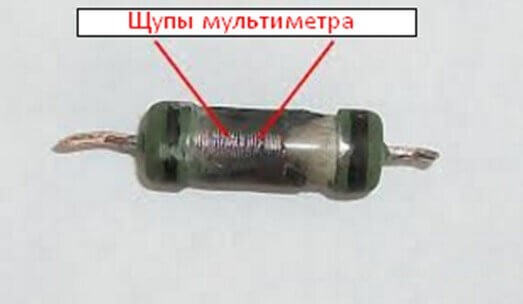
Well, if you are unlucky and part of the resistive layer is burnt out, it remains to measure a small section and multiply the result by the number of such sections along the entire length of the resistance. Those. in the picture you see that the probes are connected to a piece equal to 1/5 of the total length:
Then the impedance is:
Rmeasured* 5 = Rnominal
This check allows you to get a result close to the real value of the burned element. This method is described in detail in the video:
How to test a variable resistor and potentiometer
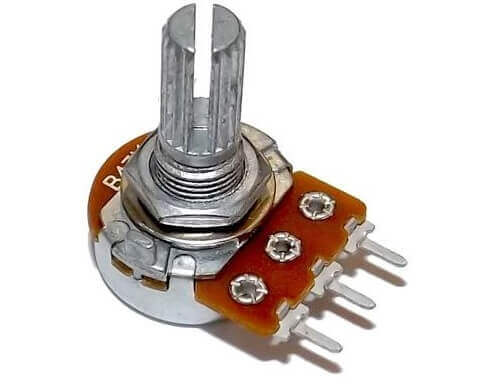
To understand what a potentiometer test is, let's look at its structure. The variable resistor from the potentiometer differs in that the first is regulated by a screwdriver, and the second by the handle.
A potentiometer is a part with three legs. It consists of a slider and a resistive layer. The slider slides along the resistive layer. The extreme legs are the ends of the resistive layer, and the middle is connected to the slider.
To find out the impedance of the potentiometer, you need to measure the resistance between the extreme legs. And if you check the resistance between one of the extreme legs and the central one, you will find out the current resistance on the engine relative to one of the edges.
But the most common malfunction of such a resistor is not the burning of the ends, but the wear of the resistive layer. Because of this, the resistance changes incorrectly, contact may be lost in certain areas, then the resistance jumps to infinity (open circuit). When the engine occupies the position in which the contact of the slider with the coating reappears, the resistance becomes “correct” again. You may have noticed this problem when adjusting the volume on old speakers or an amplifier. The problem is that when the handle is rotated, clicks or loud knocks are heard periodically in the columns.
In general, checking the smooth running of the potentiometer is more clearly carried out with an analog multimeter with an arrow, because on a digital screen, you simply may not notice a defect.
Potentiometers can be dual, sometimes they are called "stereo potentiometers", then they have 6 conclusions, the logic of verification is the same.
The video below clearly shows how to check the potentiometer with a multimeter:
Methods for testing resistors are simple, but to get a normal test result, you need a multimeter or an ohmmeter with several measurement limits. With it, you can also measure voltage, current, capacitance, frequency, and other quantities, depending on the model of your device. This is the main tool of the electronics repair wizard. Resistance sometimes fails with external integrity, sometimes away from the nominal resistance value. Checking is necessary to determine whether parts correspond to nominal values, and also to make sure the working element or not. In practice, verification methods may differ from those described, although the principle is the same, it all depends on the situation.
Useful on the topic:

