Two-wire chandelier control circuits
We use diodes
The first idea is to use a diode circuit. The bottom line is that several parallel switches installed include lamps through diodes, diodes are also installed in front of the bulbs. Since the diode passes only one half-wave of the sinusoidal voltage of the household electrical network (in this case), the lamp will turn on the one in front of which the diode is turned on in the corresponding direction.

The disadvantage of this scheme is that only half of the supply voltage is supplied to each lighting group. Incandescent lamps in this inclusion will work, but luminescent or LED, if they turn on, then such a power will lead to their premature failure. Incandescent lamps will flicker with the frequency of the mains supply, this is 50 Hz, this leads to increased fatigue of people in the room, as well as headaches and general ailments. Such light can not be used in residential premises.
Another “diode” circuit for controlling a chandelier in two wires is to turn on all the lights, but at different power, this is implemented using a diode. When the 1st switch key is turned on, the first half-wave is turned on, while the second is full voltage. It can be used to power incandescent lamps or dimmable led bulbs. At the same time, capacitors are needed so that when you press one of the keys, only the first three light sources turn on, because the capacity does not pass direct current (one half-wave is also a constant current, but pulsating). A capacitance is needed on the order of 1 μF and a voltage of more than 300 V. Domestic diodes KD202 (w, c, m, r), KD203, KD206, foreign 1n4007 (can be removed from a burned-out fluorescent lamp or charger).
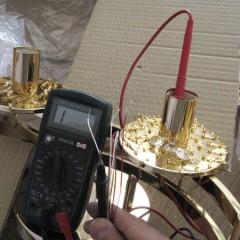
The scheme is as follows:
 We also recommend watching a video that details how to control a chandelier in two wires by adding a capacitor to the circuit:
Thermistor and relay circuit
The third control circuit of the lamp on two wires on a thermistor and a relay. When the switch is turned on, voltage is applied to the circuit and the HL4-HL6 lamps are lit. HL1-HL3 are powered through normally-closed relay contacts (K1 is its coil), when energized, they open. Parallel to the coil are connected: the driving resistor R1 and the thermistor R2. The flow of current through R2 causes it to heat. With increasing temperature, its resistance decreases (NTC or negative temperature coefficient).

The relay has a certain characteristic hysteresis, which means that the switching current is greater than the holding current. This means that with a reduced resistance R2, current will continue to flow through it, but the coil remains energized enough to keep the relay on. To turn on all the lamps, you need to quickly turn off the switch, then the resistor will not have time to cool down and the current will go through it, the current through the coil will not be enough to open the contacts. To turn on half the light bulbs again, you need to turn off the light, wait a half minute, so that the thermistor cools down and its resistance is restored, and turn it on again.
Details:
- Relays with winding resistance of about 300 ohms, U trip 7V, U release - 3V.
- R2 - three CT3-17 thermistors connected in parallel.
- R1 - MLT-0.25, in the range of tens of Ohms, to choose so that the relay works and does not work, depending on the selected mode, which is described above.
- Diode bridge - any designed for mains voltage, for example KTs407A.
- C1 - 50 mKf at 16 V.
We use the counter
Another circuit is built on logic gates. The essence of the idea is that you give impulses and logical units alternately appear at its output. They are used to turn on semiconductor switches, such as transistors.

Switching of groups of lamps occurs when the switch is switched quickly (on / off), so clock pulses arrive at the input of counter C and logical units appear at the output. Work algorithm:
- EL1 & EL
- EL1 & EL3 & EL
- EL1 & EL2 & EL3 & EL
The counter is reset when a signal is input to input R. To do this, turn off SA1 for 15 seconds.
- Counting pulses forms DD3.
- The first inclusion, at the output DD3 a logical zero is formed, is kept from C2.
- A short switching discharges the capacitor and the logical unit appears at the output of DD3. The element DD2.1 is switched on the rising edge at the counting input. And so with every short-circuit opening SA2.
Easiest option
We have already mentioned the remote control chandeliers. Their cost at the time of writing of the article starts from 1500. They have an advantage for those who do not want to assemble complex circuits - you only need to connect power to the chandelier. The remaining parameters are set using the remote control.
The range of such devices is quite wide and allows you to implement any design ideas in your apartment, including music models and models controlled by a smartphone.
An overview of such a chandelier is provided in the video:
Now you know how to organize the control of the chandelier on two wires, if there is no way to lay additional wiring from the switch. We hope that the information provided was useful to you and you were able to choose for yourself the most suitable way to solve the problem!
Related materials: