Features of installing an electric heated towel rail in the bathroom
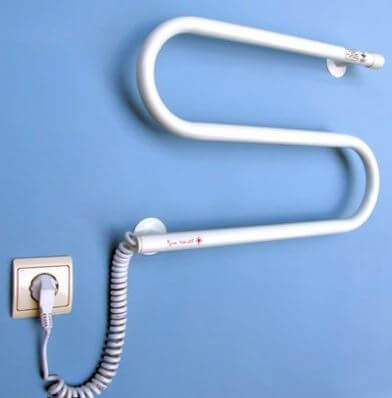
A modern solution in the field of bathroom accessories is an electric heated towel rail. This device works, as you know, from the mains, and the quality of work does not differ from the traditional water version. The advantage of the network-powered model is that it can function even when the hot water in the apartment is turned off (which happens often). In addition, the stand-alone version is easier to connect and put into operation. Read more about how to install an electric heated towel rail in the bathroom with your own hands.
 In fact, the installation technology is not very complicated and even a novice electrician will cope with it. The list of works is reduced to mounting the product on the wall and connecting to the home network. As for the latter, the connection can be made either through a wall outlet or directly from the junction box by extending the wiring in a hidden way. So that you understand how to properly install and connect an electric heated towel rail with your own hands, we provide a detailed step-by-step instruction:
- Prepare all the necessary tools for installing and connecting an electric heated towel rail: building level, marker, screwdriver, tile drill, tape measure and indicator screwdriver.
- Decide on the option to connect to a household network. Connecting directly from the junction box is safer, but at the same time, you need to take care of the wiring in the right place when installation of electrical wiring in the bathroom. Otherwise, you have to destroy the decorative finish, which is not right. As for power from the outlet, this option is more dangerous, but if you chose the right outlet height, the distance from the water and the type of housing (it must be waterproof), there is nothing to fear.

- Prepare the wall for installation of an electric heated towel rail - mark the points for fasteners yourself and make sure that they are at the same height using the building level.
- Drill holes with a screwdriver and drive in the dowels included in the kit.
- Assemble a heated towel rail according to the scheme indicated in the product passport.
- Connect the input wires to the terminals of the device (if flush mounting without a socket will be performed). Before that, do not forget to turn off the lights on the switchboard. A place wire connections it is necessary to protect with a thermoshrinkable tube or a special moisture-proof casing.
- Install the electric heated towel rail on the wall in the bathroom. There is nothing complicated here, you just need to press it against the wall so that the holes coincide with the mounts and tighten the screws. Please note that mounting upside down is prohibited. In this case, the device may not work correctly, or even fail.
- Make sure that the connection and installation were done in a high-quality way: move the case and make sure that it “sits” securely in the wall, check the connection of the wires.
- Turn on the machine on the switchboard and check the operation by pressing the power button. The light indication should immediately light up and heat will flow from below through the entire chrome tube.
That's the whole technology of installing and connecting an electric heated towel rail with your own hands. As you can see, the installation is really simple and does not take much time. At the same time, a specialist’s call will cost at least 3 thousand (the average price in Moscow). Finally, we recommend that you definitely connect to the wiring in the bathroom RCD 30 mA, which protects you from electric shock when it leaks.
So that you can clearly see how the installation of an electric heated towel rail in the bathroom on a wall made of tiles and drywall, we recommend that you watch a detailed video instruction:
In addition, we recommend that you look at the photo of the existing design options for the device:
Also read:


