How to conduct wiring in the house - step by step instructions
The process consists of several main stages:
- choice of laying method (open, hidden);
- creating a schema;
- marking work;
- selection of constituent elements;
- direct wiring;
- obtaining permission to connect to the local power grid.
On the example of a new house, we will consider how to independently conduct electrical wiring.
- Choosing the type of electrical installation
- Schema creation
- Marking work
- Selection of wiring accessories
- Material calculation
- Electric installation work
- Step 1 - Wall Chipping
- Step 2 -Junction box mounting
- Step 3 - Cable Installation
- Step 4 - Connecting Outlets and Switches
- Obtaining permission to connect to the local power grid
Choosing the type of electrical installation
The first thing you need to start with is to decide on how to install the line. To date, open and hidden type wiring is used.Open wiring It is a fastening of all constituent elements over the finished walls (routes are laid in special cable channels).

Open line routing
The advantage is as follows:
- the damaged area can be repaired without any problems (no need to cut the wallpaper, destroy the plastered walls, etc.);
- simpler installation and preparatory work (no need ditch the walls for electrical wiring in home);
- convenient to add new branch points.
The disadvantages of this installation method are one - very often does not fit into the general interior of the rooms as cable channels have a not too attractive appearance.
Hidden wiring in the house is more popular. In this case, wires and cables are laid in the walls, for this purpose, gates are drilled - grooves in the walls, ceiling and floor, or behind a suspended ceiling and wall cladding.

Advantage:
- Do not spoil the interior of the rooms with their appearance;
- it is fireproof;
- cheaper than outdoor.
- the probability of damage is much less;
- high durability of all elements.
Among the shortcomings are:
- complexity of repair and maintenance (to replace wiring in the house either connect a new point, you need to open the wall trim;
- in the event of a failure, it is very difficult to find the exact location of the failure if you do not use special devices, for example, homemade metal detector;
- prohibited in a wooden house according PUE 7.1.38.;
- for electrical work you need more experience and a set of tools.
We recommend that you nevertheless opt for the latter method, sinceit is more durable and the whole line is not striking! When choosing high-quality components and the correct installation of electrical wiring in the house, the probability of breakage is extremely small.
Schema creation
Details of the rules for drawing up a wiring diagram are provided in the article: https://my.electricianexp.com/en/kak-sostavit-sxemu-elektroprovodki-pered-remontom.html. Briefly tell you the most basic thing you need to know. In order to draw a wiring diagram, you must first provide for the location of the following elements in a private house:
- determine where the input cable enters and where the electrical panel will be located;
- automation (RCD, circuit breakervoltage relays, difavtomaty, possibly SPD);
- powerful household appliances (for example, a washing machine, electric boiler, stove), because it needs a separate power line;
- ceiling lamps;
- sockets, switches, distribution boxes.
The following requirements and recommendations should be noted when creating an electrical wiring diagram in a house:
- Wires should pass along the walls and ceiling only strictly vertically and horizontally. Turn should be at right angles. Can also conduct electrical wiring on the floorif you use a special electrical plinth.
- Place the wiring on the wall should be at a distance of 20 cm from the ceiling, while to placesinstallation of sockets and circuit breakers go straight down.
- From the door and window openings, the network should pass at a distance of 10 cm.
- Switches must be made at a distance of 80 cm (or 150 cm) from the floor, on the side of the door handle.
- Installation of sockets is carried out at a distance of 30 cm from the floor, while above the kitchen worktop sockets must be installed at a height of 10 cm.
- In rooms with high humidity, switches and sockets are not recommended. According to GOST R 50571.11-96 (IEC 364-7-701-84) Electrical installations of buildings. Part 7. Requirements for special electrical installations. Section 701. Bathrooms and showers. ” It is best to bring all the necessary elements outside the room. If you want to place sockets and switches in the bathroom, check out the article:https://my.electricianexp.com/en/gde-i-kak-raspolozhit-rozetki-v-vannoj-komnate.html.
Based on the recommendations, proceed to creating your own wiring project.
You can use one of the following wiring diagrams in a residential building as an example:


It is best to use a photocopy of the plan of your home for such purposes, because the exact dimensions of the rooms and the placement of windows, doors, and walls are observed in this documentation.
After the design scheme is completed, we proceed to the marking work.
Marking work
Marking works are drawing on the walls with chalk or coal the cable route, as well as the installation locations of its elements. To quickly and smoothly make a route of electrical wiring, it is recommended to use a rope pre-painted in chalk (or coal). Such a rope is correctly called a marking or painting cord, you can see how to use it in the photo below:

All that is needed to create one of the sections is to fix one end of the rope in its original position and carefully stretch it to the end point (so that the painted rope does not touch the wall). After this, the rope must be pulled and sharply released so that the trace remains on the wall. Learn more about how to make wall markings for wiring, you can from our separate article.

After the marking is completed, it is recommended to photograph the walls in a private house. This will allow you to quickly find wiring when it is replaced or repaired.
Selection of wiring accessories
At this stage, it is necessary to select all the planned electrical products for wiring. Do not save on materials if you want your wiring to last a long time. This issue is discussed in detail in a separate article: materials for electrical installation, in the framework of this article we will highlight the most important.

We recommend that you choose the following items:
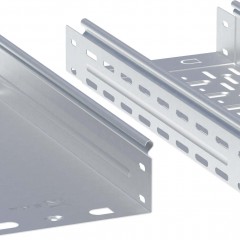
- Junction boxes, corrugation and cable ducts of non-combustible or self-extinguishing materials that do not spread combustion.
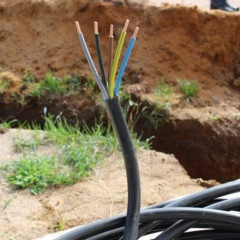
- Copper cable (its service life is much longer than that of an aluminum product). In addition, copper conductors are able to withstand higher loads. We recommend that brands like VVGng or NYM;
- The cross section of the cores on the outlet group is at least 2.5 mm. sq. (withstands current up to 25 A, but is usually protected by a 16A machine, which is enough for home conditions, although it is better to implement cable section calculation for individual conditions of use). For the installation of lighting, you can choose a cable with a cross section of 1.5 mm2 sq., But to connect powerful household appliances you will have to purchase a thicker conductor - 4 mm.kv.
Material calculation
In addition to the fact that you need to calculate the exact number of sockets, switches, installation boxes, you also need to take care of the length of the wire for the installation of all electrical wiring in the house.
Be sure to get the length with a margin, otherwise in the process of work there may be a nuisance when literally 10-15 cm is not enough for you to the end point.
We advise you to calculate the length taking into account the following rules:
- For installation boxes, add 10-15 cm + box depth to the length.
- For the installation of fixtures add 10-20 cm, depending on which lamp will be installed. Choose the length so that the end protruding from the ceiling can be hidden in the luminaire, but in order to make the connection convenient.
- To the length of each segment add 10-15 cm for wire connections between themselves.
About, how to calculate the amount of cable for wiring We talked in a separate article. The option for the lazy is to multiply the area of the house by 2, this will need the cable length for home wiring.
Electric installation work
So, there is a scheme, the constituent elements are acquired, the walls are prepared. Now you can do the installation of electrical wiring in the house with your own hands. Step by step we will consider all stages of electrical installation.
To work, we need the following tools:
- Stroborez or small grinder with a diamond disk
- Perforator with a crown on brick or concrete
- Screwdriver
- Hammer
- Chisel
- Sharp knife
- Master OK
- Putty knife
- Foam grater
To make the information better perceived, we will provide the whole process of wiring the electrical wiring in a private house in the form of step-by-step instructions.
Step 1 - Wall Chipping
With a shtroborez, grinder, puncher or manually, we make grooves (shtrobes) for the installation of new wiring in the house. The dimensions of the grooves should be as follows - a depth of 2 cm, a width of 2 cm, if there is one cable, and if several, then we select the width in fact so that the cables are not laid too tightly. You can read about how to ditch walls for wiring in a house from our separate article: https://my.electricianexp.com/en/kak-pravilno-sdelat-shtroby-pod-provodku-instrukciya-v-kartinkax.html.
In places for installing junction boxes, switches and sockets, we make round recesses with a perforator with a crown (we select the depth and diameter of the strobe in accordance with the dimensions of the products). Depending on the type of wall, we select a diamond or victorious crown (for concrete) or a crown for wood and drywall.

You can see how to make shtrobes for electrical wiring in the house in the video below:
Step 2 -Junction box mounting
In the wells (the so-called round strobes) are installed boxes and socket boxes. For their installation, it is recommended to use screws with dowels or a layer of asbestos (about 2 mm). After reliably fixing the boxes, go on.

You can visually see the installation process of the sockets on the following video:
Step 3 - Cable Installation
The stroba is cleaned of the remnants of dust, stones and other foreign objects, primed or spilled with water, after which it is necessary to lay the cable in it. For fixing wiring, it is recommended to use plaster or alabaster. Those who do not want to deal with the solution can fasten the wire with dowel clamps.
Tacking step - about 40 cm. About the rest ways to fix the cable to the wall we told in the corresponding article, which we strongly recommend reading!

Step 4 - Connecting Outlets and Switches
As soon as the plaster completely hardens (after about a day), it must be thoroughly wiped with a grater. After that, you can proceed to the installation of sockets and switches.
Some publications that we recommend that you familiarize yourself with:

That's the whole installation instructions for wiring in a private house from scratch. We recommend that you also watch visual video tutorials in which this event is described in more detail:
Obtaining permission to connect to the local power grid
An energy supply company is required to make an electrical connection for facilities up to 15 kW, regardless of whether it has such an opportunity. A connection with a dedicated power of up to 15 kW, and a line length of not more than 500 meters costs 550. For the money you get TU for connection. After assembling the distribution board, you need to contact the RES and call an inspector to seal it, then the electricians must connect your “box” to the electricity - the VLEP support.
This question is clearly discussed in the video:
So we examined how electrical wiring should be done in the house with our own hands. We hope that the step-by-step instructions provided were understandable and useful, and the video tutorials helped to better understand the entire wiring process!
Also read:


super……..