How to make fiber optic lighting with your own hands?
What does the system consist of?
Typically, such systems are sold as a kit, in which everything you need is already included. But in addition to the main components, you can add additional elements that will help create an individual interior. This, for example, special illumination using LED strip or special lenses or crystals.

Fiber optic lighting includes the following components:
- Projector. Of the entire system, only he is connected to electricity. From what power the device depends on the amount of light emitted.
- Fibers Thanks to these elements, you can also adjust the amount of light that is allocated and distribute it around the entire perimeter of the bath at your discretion. When choosing a harness, it is better to give preference to the glass model, since it can withstand temperature differences more. Harnesses are of two types: lateral glow (creating light patterns using interweaving of fibers) and end glow (creating a starry sky).
- Lenses and fixtures. Fiber optic lighting with the help of such elements acquires directional glow. After all, it is precisely such lenses and crystals that regulate the scattering and direction of the light flux.

When choosing a bundle of a fiber optic system, attention should be paid not only to the length and number of fibers, but also to which lamp is used. Halogen and gas discharge lamps require cooling, and since some cooling systems have noisy fans, this can ruin your vacation.
Side Glow Method
Such lighting can be done with your own hands, since it does not require complex electronic circuit designs. Installation is simple: just install the projector outside the sauna. This is done as follows:
- A projector is installed in the room in front of the bathhouse. The place where it is mounted should be next to the steam room (have a common wall). If the projector is installed in the same room, it must be located at a distance from the heat source.
- If you wish, you can install additional accessories on the device, for example, color discs.
- According to the scheme, mark the places where the optical fiber will be placed.
- Install fiber optic lighting.
- If you wish, you can install color nozzles (lenses or crystals). The connection of this effect can be either automatic or manual.

Important! When installing the optical fiber, it is necessary to take into account the permissible kink of each optical fiber. It depends on the diameter. Therefore, the focal length of the products should be more than 85%. All this is thought over when the system diagram is drawn up.
End glow method
It is better to carry out installation of such light before carrying out interior decoration. Previously, an accurate layout of point elements should be made.

Installation of fiber optic backlight should be done in the following order:
- Cut the harness to the required length. And in order to find out the length, you should measure the distance from the projector to all the points of illumination.
- Lay the fibers in place, first secure them with tape.
- In order to maintain the pattern and fix the bundles vertically, it is necessary to install dowels in certain places to which fibers are attached with the aid of a wire. To attach it was convenient dowels should protrude three centimeters out.
- The surface is sheathed and all unnecessary adhesive tape and dowels are removed.
- Then you need to cut the fiber optic bundle. This is done according to the level of skin. Next, sand the ends of the tow using fine-grained sanding paper.
- The other ends of the fiber are connected to the connector and connected to the projector.
During installation, it is necessary to carefully monitor the bends of the optical fibers. Upon completion of installation, if desired, you can add various lenses and crystals to the system.
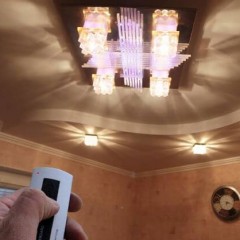
Such a connection scheme for fiber optic lighting is also suitable for the washing compartment. Especially if there is a pool there, then such a backlight will look very good at its bottom. In the lounge, in the living room or bedroom, fixtures with fiber optic can be combined with standard lighting fixtures. The atmosphere created in this way will help to relax.
Finally, we recommend watching a useful video on the topic:
So we looked at how to make fiber optic lighting with our own hands. We hope that the installation instructions provided were useful and understandable for you!
Surely you do not know: