How to fix the LED lamp yourself?
Get acquainted with the device LED bulbs
Before proceeding with the repair of a bulb of 220 or 12 volts, you must familiarize yourself with its device. As mentioned above, the design is extremely simple. The lamp can be conditionally divided into three parts: a housing with a base and a filter, a power supply board for LEDs, and an LED module.
Having carefully disassembled the case, the interior of the electronic circuit will open in front of you. For the most part, Chinese manufacturers of low-cost devices, such as corn and similar LED light emitters, install transformerless capacitor current sources. In these circuits, the capacitor acts as a limiter of current and voltage.

For the reader’s information, we say that the working voltage of one LED is 3.3 Volts, and the current of a semiconductor crystal is about 20-50 μA, depending on the type of diode. If these parameters are overestimated, the diode will overheat and the crystal will break, fail.
How are LED bulbs arranged? Consistently in a chain of 50-60 LEDs are soldered together, together forming a light-emitting element at a voltage of 180 volts. A power capacitor with a resistor limits the current and voltage to the desired level.

Often the manufacturers of such devices are deliberately deceiving, and here's the thing: if you increase the current through the crystal above the nominal value, but within reasonable limits, then the radiation from the diode will increase. In this regard, heat dissipation will also become higher, with which you can fight for a short time. This trick sets them apart from the competition, due to the greater brightness with the same declared power. However, it leads to a drop in light emission or destruction over time and bitter disappointment of the user.
How to fix a failed item?
So, having an idea about the device of the electronic circuit of our LED lamp, which does not work, consider how to repair it at home.
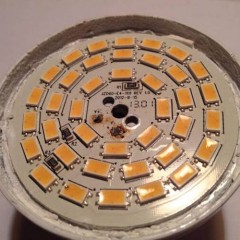
First of all, we make a visual inspection of the microcircuit and the diodes themselves. In 80% of cases, a blown LED is a failure. To carry out repairs, you must first find a diode that visually differs from the others, for example, by the presence of a pronounced black dot, as shown in the photo below, and then replace it with a new one.

Video tutorial on repairing an LED bulb in which the LED burned out:
A current limiting resistor may also burn out. Rarely, working capacitors fail, with their failure disabling the remaining elements of the LED device.
Once you study this page, we hope that you have a soldering iron and minimal concepts in electronics. Now about the troubleshooting technique. The diode can be checked both with a multimeter and with a crown with a 1 kΩ limiting resistor. Alternately putting the wiring on the terminals of the LED, the working one will shine. The multimeter in the position of the continuity will also cause the LED to glow, observing the polarity.
If there is no problem with the light emitter, we check the limiting resistor with a tester, in most circuits its rating is about 100-200 Ohms. We recommend viewing a more complex repair on the video:
Also the scourge of modern schemes is such a thing as “cold soldering”. This is when, over time, contact breaks down in a poorly filled tin soldering place.

The circuit is destroyed physically and breaks the integrity of the circuit, as a result of which the LED lamp does not turn on. Damage can be repaired by reheating the contact area with flux applied to it.
Rarely encountered malfunctions are a breakdown of a rectifier diode or capacitor that occurs during voltage surges. Using the tester, you can install it thoroughly. By identifying the cause and replacing the burned-out element, you can return the bulbs to their working condition. Learn more about how to check capacitor, you can in our corresponding article.
In more expensive LED devices, instead of a capacitor power supply, there is a switching power supply, which automatically adjusts to the voltage in the network, and by regulating it, it keeps a constant value of voltage and current at the output, preventing diode crystals from overheating, providing long service life and a constant light flux.

The method of troubleshooting is practically no different from the above, and most likely it will be cold soldering on any of the elements. Repair of the LED lamp in this case is not difficult.
If the diode lamp does not light up or flickers, the cause is not always the cause of its malfunction. In most cases, the flashing occurs because it is connected to a backlit switch. In this case, you can solve the problem by replacing the switch with a normal one. Also, as a repair, you can consider another simple way to fix the problem - turn off the backlight on the switch by disconnecting the diode lamp in it.
However, sometimes the lamp may still flash because something went away in it, for example, the wire from the base was unsoldered. In this case, repairing it is quite simple, using the following technology:
Idea for Home Masters
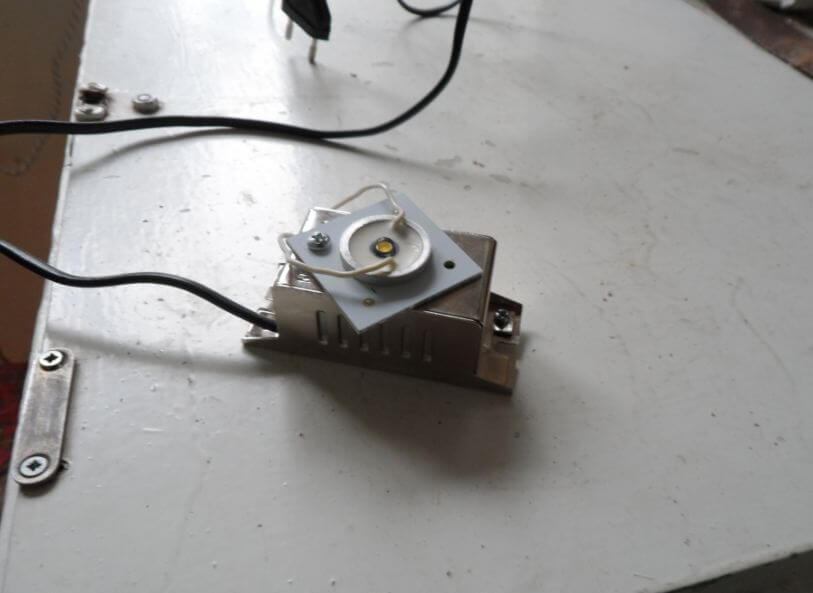
After reading our article, you may have such a question, but is it possible to assemble such a light source yourself? It’s possible, that’s exactly what I did before I started using factory LEDs, and then because of the specifics of the chandelier and design.Using an LED strip and a converted electronic transformer, a lamp was made on a desktop with two operating modes. Later, a nightlight was made on one powerful three-volt diode and a decorative twine sconce.


You can also find out about how to make an LED light bulb in our separate publication. We hope that we have interested you in this article, not only the possibility of repairing the LED lamp with your own hands, but also the idea of creating beautiful and unusual light sources!