How to connect the light switch?
Variety of fittings
I think that any electrician-beginner knows about the purpose of the light switch. The usual single-key product allows you to de-energize the entire group of fixtures brought to it. This embodiment is customary to install in any room that has one group of bulbs.

The purpose of the two keyboard models is to control a lamp having two groups of bulbs. For example, for lighting in the kitchen, several spotlights are mounted above the countertop, and several above the dining table. During cooking, it is not necessary to turn on all the lights, but just light up the countertop.

The principle of operation of a three-key product is similar to the previous one, only in this case, it is possible to regulate three groups of bulbs. Usually connecting a light switch with three keys is performed in living rooms and bedrooms, to adjust the lighting of multi-path chandeliers.

Now we will consider how to properly connect the light switch with one, two and three keys, providing a brief step-by-step instruction, all the necessary diagrams and video tutorials, which should be understandable even for dummies in electrics.
Preparatory Activities
Before starting the connection, it is necessary to prepare all the materials and tools, as well as to carry out several actions that are necessary for the safety of electrical work.
First, let's determine the main points:
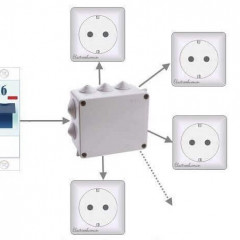
- Method for connecting wires in a junction box: soldering either wago terminals.
- Before connecting the light switch, you must turn off the electricity in the house (or apartment) and make sure that there is no current in the network using an indicator screwdriver.
- The instruction will be provided step by step, from the stage when the gate is prepared, and the socket box and junction box are installed in their places. You can learn more about these processes in the article: installation of electrical wiring in the house.
- It is necessary to connect a phase wire (L) to the light switch, and not a neutral wire (N). This is due to the fact that the voltage passes through the phase. If the wiring is incorrectly connected (if zero is connected), you may be shocked by replacing the light bulb.
- Before you begin, you should familiarize yourself with color coded wires, to correctly connect the wires between themselves (phase to phase, zero to zero).
Among the tools and materials for connecting the light switch you will need:
- a set of screwdrivers (curly, straight, indicator);
- connector (if soldering, then soldering iron and solder);
- pliers;
- sharp knife.
Having become acquainted with all the necessary information and having prepared all the tools, you can proceed to the basic installation process!
Wiring
When connecting a one-key, two-key and three-key switch with your own hands, the wiring diagram from the junction box to the lights will be slightly different. Now we will consider each of the options!
One key
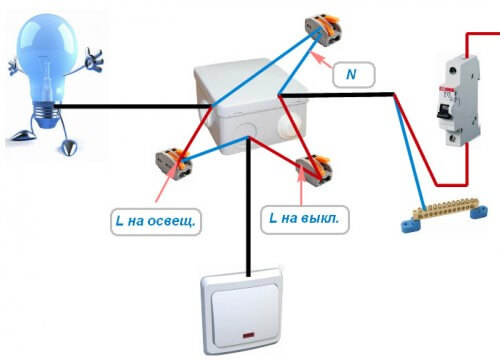
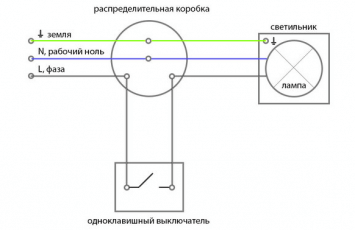
The single-key switch is the easiest to connect. The junction box includes two wires - neutral and phase.
-

- Circuit without grounding
-
- Grounding circuit
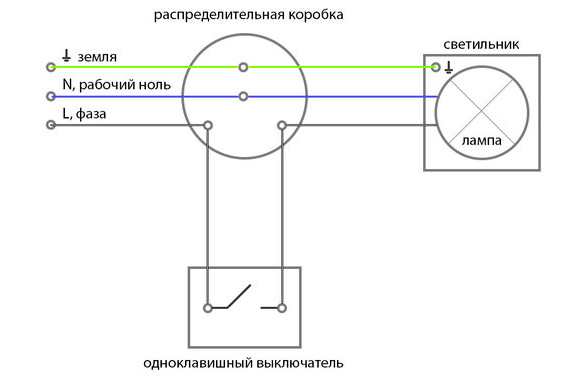
Input zero (blue) immediately connects to zero fixtures (see diagram). The input phase first goes to the switch, then back to the box and after that it is already connected to the phase of the bulb. That's the whole wiring diagram for a single device. As you can see, there is nothing complicated, the main thing is not to confuse the cores with each other (which happens very often, despite the fact that only two wires are routed in the wall).
Two keys
Wiring diagram for a two-gang switch slightly different. This is due to the fact that the circuit will be broken for each group of luminaires separately. As in the previous case, two wires will enter the junction box. The blue conductor at the entrance to the box immediately connects to the other blue wires.
The phase is first conducted by a gap of two buttons, fixed in a special input hole. Two outgoing wires go to each group of fixtures (or just two bulbs).
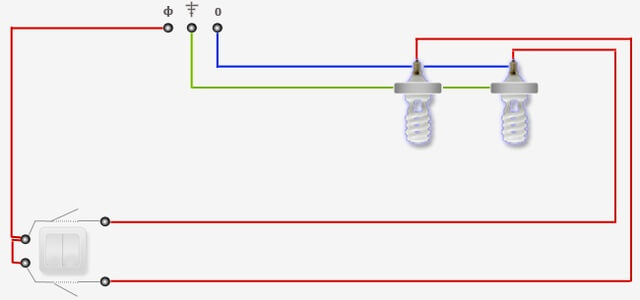
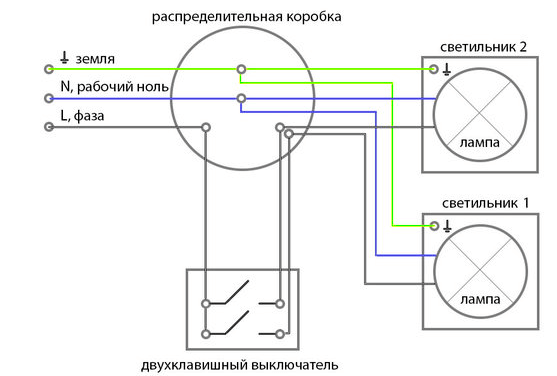

Please note that there are 3 outputs on the back of the case: two on the one side and one on the other (see picture below). Here you need to be careful and not mix anything up: where there is one input, you need to connect the incoming phase, and where there are 2 holes, outgoing phase wires should go out to the lamps.
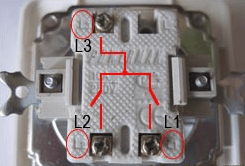
Inlet holes on the housing
Visual video instructions for connecting a dual device:
Three keys
The connection diagram of the triple light switch is similar to the installation of a two-gang product. Zero, as in previous cases, is twisted with the zeros of all three groups of bulbs. The input phase is directed to the gap, and from there it is divided into three separate phase conductors, each going to its own group of lamps.
We provide you with a visual diagram:

Video installation instructions:
Product Installation
Previously, we examined the rules for connecting wires from the junction box, now it is necessary to fix the housing in the wall.In this article, we consider installing a hidden enclosure. In the gates, the socket boxes should already be installed in advance and wires should be wound.
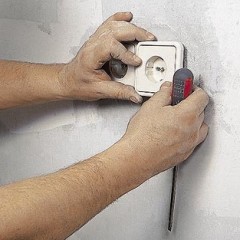
All you need is to fix the cores with special screws and carefully insert the core into the socket, as shown in the photo below.

Fixing contacts in the housing
On the sides are 2 screws that burst with locking side paws. Using a curly screwdriver, we rotate the screws one by one, making sure that the case does not warp during installation.

The room in the gate
When the core "sits" tightly in the gate, you just need to install the top decorative cover and check the operability of the product.

Final step
Related Material:


Thank you so much!
I made it! Now I have light in the pantry! THANK!!!
Hello, explain the reason why one key of the switch does not turn on the light and the second one turns on, and when you turn on both keys, both lamps are on.
They say, like that from above it is one phase outgoing and from below one incoming another outgoing, so it turns out that with one button you can steal everything at once)