How to connect the circulation pump to electricity?
What is important to know?
The wiring diagram and methods for connecting a device such as a circulation pump to electricity can have various designs. The choice of a specific option is determined by the characteristics of the heated object, as well as the place where the device is located. There are two ways to connect it:
- direct connection to the 220 V power supply network;
- connection to an uninterruptible power supply, which, in turn, is connected to a 220 V or 220/380 V network (in the case of a three-phase UPS).
Choosing the first method, the consumer risks to remain without heating in the event of a prolonged blackout. Such an option can be considered justified only with a high degree of reliability of power supply, which reduces the likelihood of a long power outage to a minimum, and also, if there is a backup source of electrical energy at the facility. The second method is preferable, although it requires additional costs.
Connection Methods
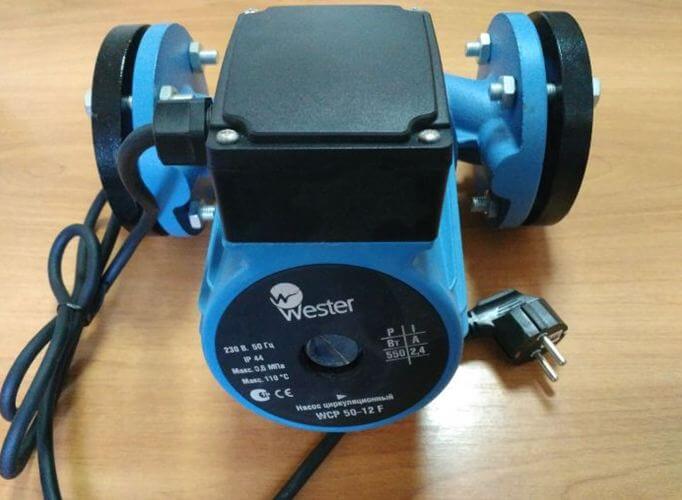
Mains connection with plug and socket. This method provides installation of an electrical outlet in close proximity to the place where the circulation pump is mounted. Sometimes they can come with a cable and plug in the kit, as in the photo:
In this case, you can simply plug the appliance into the mains using an outlet located in the reach of the cable. You only need to make sure that there is a third, grounding contact in the outlet.
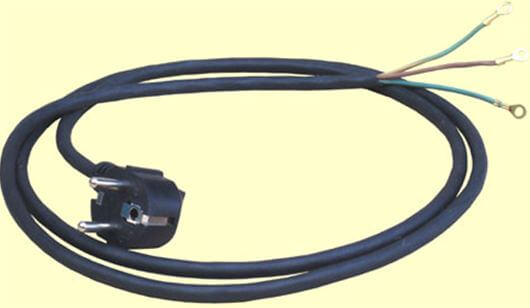
In the absence of a cord with a plug, they need to be purchased, or removed from an unused appliance. Pay attention to the cross section of the cord conductors. It should be between 1.5 mm2 up to 2.5 mm2. The wires should be stranded copper, providing resistance to repeated bending. A cord with a plug for connecting electrical appliances to the network is shown in the photo below:
Before you connect the circulation pump, you need to find out which of the three wires of the cord is connected to the grounding terminal of the plug. This can be done using an ohmmeter, at the same time checking the integrity of the remaining wires.
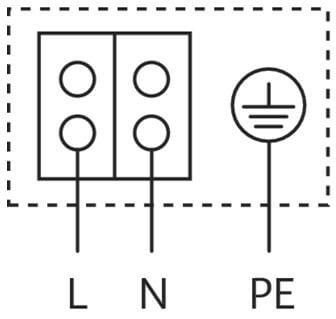
Open the terminal box cover. Inside the box there are three terminals designed to connect the device to the network, marked as in the picture:
We unscrew the cable sleeve clamp (in the first photo it is a plastic nut into which the cable is inserted), put it on our cord, insert the cord into the sleeve. If there is a cable tie inside the box, thread the cord through it. We connect the ends of the cord wires pre-stripped from insulation with the terminals.
To the L and N terminals, you need to connect the wires connected to the plugs of the plug (do not be afraid to mix them up, this is not critical), to the PE terminal you should connect the plug grounding wire (but you can’t make a mistake here). The instructions supplied with the product prohibit the use of it without protective earth. Next, tighten the clamp (if available), tightly tighten the cable sleeve clamp, bury the terminal box cover. The pump is ready to be plugged in.
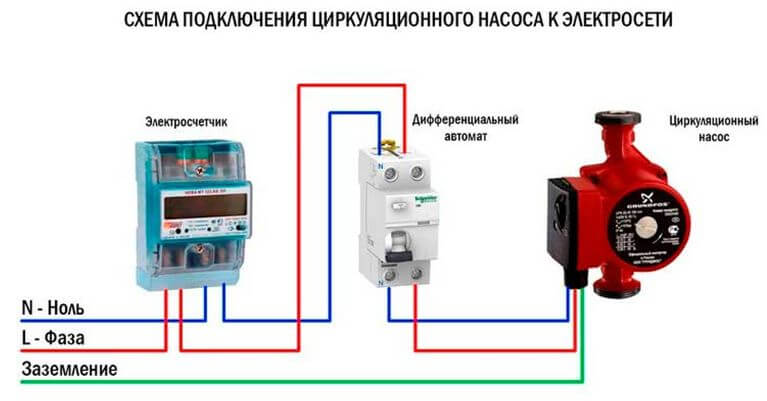
Fixed connection. The connection diagram of the circulation pump to the power supply with grounding is provided below:
The requirements for the cross-section of wires are the same as in the previous version. The cable for this installation can be used both flexible and inflexible, copper, brands VVGor aluminum AVVG. If the cable is not flexible, the installation must ensure its immobility. To do this, the cable along the entire route is fixed with clamps.
In this embodiment, a residual current circuit breaker (differential automaton) Instead, you can use the usual single-pole circuit breaker, passing only the phase wire through it. If the machine is installed in a panel where there is a PE bus, then the cable from the pump to the machine must be three-wire. In the absence of such a bus, the PE terminal should be connected to a grounding device. Such a connection can be made with a separate wire.
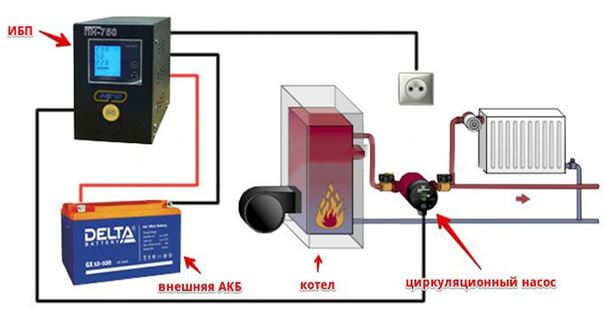
I would also like to consider such an installation option as connecting the pump to the UPS. It is most preferable and ensures the independence of the functioning of the heating system from power outages. The connection diagram of the circulation pump to the uninterruptible power supply is provided below:
The UPS power should be selected based on the power of the pump motor. The battery capacity is determined by the estimated time of the autonomous power supply of the circulation pump, that is, the time when the power supply is disconnected. About, how to choose a UPS for the boiler We talked in a separate article. Requirements for cable cross-section, as well as for the presence of protective grounding, apply to all connection options.
Finally, we recommend that you watch the video instructions for connecting various models of pumps to the mains:
So we examined how the connection of the circulation pump to the mains is carried out correctly. The diagram and video examples helped to consolidate the material and clearly see the nuances of installation!
It will be useful to read:



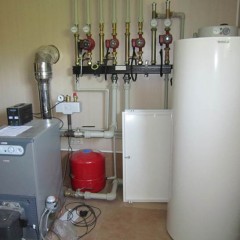


There are no questions on connecting the pumps, but what did the technologist (installer) think when he placed the filter upside down on the collector ?! (first video)