How to repair a fluorescent lamp?
Troubleshooting Procedure
Before looking for a breakdown, make sure that there is voltage, it is possible that there is no voltage and there is a reason that the fluorescent lamp does not light up. If this is not the reason, we look for it in that order.
Replace starter if:
- turned on the light and nothing happens;
- the bulb glows only along the edges;
- the light flashes with a strobe;
- the starter is on and the lamp does not start.
We draw your attention to the fact that manufacturers recommend replacing fluorescent lamps and starters at the same time.
Replace the bulb if:
- she blinks a stroboscope;
- the edges of the flask are black;
- it glows, but the brightness is not enough (dimly shines);
- the lamp does not work.
A typical failure of budget fixtures is the destruction of lamp holders and loss of contact. High temperature of the closed luminaire, the cause of the destruction of the plastic fasteners and connectors. If possible, replace them, bend the contacts in case of a satisfactory condition.
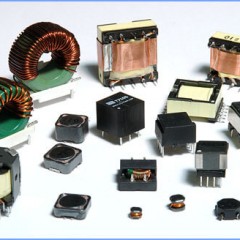
A possible malfunction is the throttle burnout, often this breakdown is visible visually, a changed color, a molten terminal.

If you really find a malfunction, you will have to replace the throttle with a working one to repair the lamp. You can check the performance with a multimeter, the working resistance is in the order of 30-40 Ohms. Before placing the lamp in a dormant lamp, make sure that the throttle is not closed. Otherwise, you will lose a worker too.
Sometimes there is a breakdown of wires - from the vibration of the lamp, the core near the lamp holder or throttle breaks off. In this case, the repair of the fluorescent lamp comes down to restore contact. Owners of old-style fixtures bypassed these malfunctions.
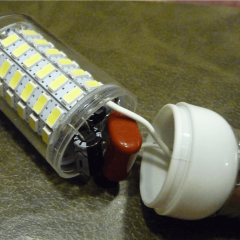
If you have a lamp with electronic ballasts made in china and replacing the light bulb did not solve the problem, most likely the problem is in the electronic unit. In most cases, you can fix it yourself, having a soldering iron and a multimeter at your disposal. Below we will dwell on how to repair the electronic ballast of a fluorescent lamp with your own hands.
Repair instructions
Now we will consider the main malfunctions that can be fixed without much investment. Let's start with electronic ballast, because in its circuit there are a lot of elements that can fail, and besides, tubular fluorescent lamps with electronic ballasts are more common today.
Ballast
The most common malfunction is the breakdown of transistors.You can only determine this failure by dropping transistors from the circuit and checking them with a tester. In general, the transistor transition resistance ~ 400-700 Ohms. Burning, the transistor pulls a resistor in the base circuit with a nominal value of 30 ohms.
There is also a fuse or a low resistance 2-5 Ohm resistor on the board, most likely it will have to be replaced, and the repair will end. You may additionally have to change the diode bridge or its elements.

A breakdown of 47n film capacitors (microfarad floor) or a resonance capacitor in a filament circuit is rare. There were cases when all of the above is intact and working, and the lamp does not work, the reason lies in the DB3 dynistor. If you checked all the elements of the circuit, then try replacing the dinistor.
Perhaps decide that it will be cheaper to purchase a new electronic ballast than to repair a broken one. Replacing the starting equipment should not be difficult, because the connection diagram is applied to the device itself. Upon careful study, it is easy to understand, L and N are terminals for connecting to a 220V network.

We also recommend watching a video that clearly shows how to repair the electronic ballast of a fluorescent lamp yourself:
We draw your attention to the fact that with this technology it is possible to fix the energy-saving CFL bulb. For example, if one glow burns out, repair is the following procedure:
Starter + Throttle
If your old-style lamp does not light up and you are sure that the reason lies precisely in it, the first thing we recommend is to check the starter. The easiest way to do this is with a working starter with the same specifications on hand. However, if there is no suitable device for replacement, then it is possible to carry out a functional check using an incandescent bulb with a cartridge. Everything is quite simple - we connect one wire from the cartridge directly to the outlet, and the second through the starter, as shown in the photo below:

If the light does not glow, then the reason is in it. Instructions for replacing the starter of a fluorescent lamp are clearly provided in the video:
The inductor can be checked with a multimeter, ringing its winding. If the throttle is really out of order, then the repair of the fluorescent lamp is reduced to the fact that you just need to change the throttle for the whole.
Here are the main problems that have been personally encountered and successfully resolved. Following our algorithm, troubleshooting will take a little time and there will be a couple of trifles to return the lamp to work on its own. We hope that our DIY repair instructions for fluorescent lamps were understandable and useful for you! Be sure to watch the video tutorials, as they thoroughly examined all the steps that allow you to fix a broken bulb.
It will be interesting to read:


Have a question! Why the luminescence of the lumin lamps is not uniform, from beginning to end there are transverse dark stripes, such as zebras, which are missing, are included in the 2x36w epra
Do you mean long linear lamps? Maybe the mercury vapor is already fading.
the question is this. I bought a UV linear lamp and a lamp. And they do not fit together. The lamp is shorter than 7 mm - there is no contact with the sockets. What can be done? shortening is problematic: holes for fastening the plinths in the place of cutting the case by 7 mm.
47n is not half a microfarad ..
I can not find the EI-56 ballast for a fluorescent lamp
Tell me where I can order it, or which one to replace
Sincerely, Alexander
also wanted to say - 47nF is half-0.1-microfarad, half-microfarad is 470nF!
Good afternoon. Please tell me in which part of the circuit I should look for a fault in the electronic ballast: VS ELXe 258.222
The symptom is the following, when the lamp is turned on, they burn for 2-3 seconds and then are cut down (very rarely continue to burn). Subsequent switching on can be carried out only after 10-15 seconds.
I am gratefully waiting for answers.
Are you sure that it is ballast? Maybe all came to replace the lamps?
Start by checking the capacitors at the input, and then a comprehensive check of all components ...