Ideas for assembling a street lamp from improvised means
Site selection and preparation of materials
Before proceeding with the manufacture of a lighting device with your own hands, you need to consider where the street lamp will be located. Depending on the location, the method of fastening the structure will be selected. A homemade lamp will be a great solution when gazebo lighting, porch or perimeter of the whole house.
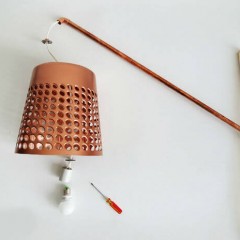
The mounting method may also be different. A street lamp can be mounted on a support or attached to a wall or just hanging. The most difficult thing is to make a lantern on a support, since this requires finding the necessary pole. If you make lighting yourself, then it is best to select simpler options, as in the photo below:

For the manufacture of a lighting device, you can take any of the materials at hand. It can be wood, plastic, metal or glass. If you want to make a device that will serve for many years, then the best solution would be a metal lamp.
For work, it is necessary to stock up on metal (sheets and rods) and a welding machine. If this is not the case, then you can use improvised fasteners.
Step-by-step assembly instructions
To assemble a street lamp made of metal, you must first select its model. This can be a retro style (antique) or minimalism. Homemade forged lamp is considered popular, which we offer to make.
The first stage of work is the creation of a sketch of the future lamp for the street. The image below shows a common option:

To make such a product strong and durable, you need to start by drawing up a drawing. The design consists of the following elements:
- side walls (4 pieces);
- top cover;
- bottom cover (bottom);
- decorative finish.
Drawing example:

In the manufacture of home-made street lights, cold forging is used. If there is welding equipment, then connecting all the parts will be easy and simple, this will greatly simplify the task. If such a device is not available, then it will be necessary to prepare fasteners in advance. It can be bent corners of the walls of the product. Do not forget about glass. Before assembling the structure, you must first install the glass. You also need to think in advance how to fix the electric cartridge in the lamp, if this is provided for by the design.
Installation and Connection
To connect a street lamp to the electric network (it can be a regular or diode lamp) you need to stock up on the following elements:
- Cable production (VVG cable) A two-wire cable is recommended for connection.
- Terminal blocks. With their help, reliable fastening of the connection points of the wires is carried out. Their type depends on the number of compounds. Pads are designed for currents up to 10 A.
- Corrugated pipe. Diameter is better to take up to 25 mm. Corrugation provides protection against various rodents and from mechanical damage.
As a rule, a street lamp, which is installed near the house, is connected to a power source through cable wiring. To arrange all the wires, it is necessary to prepare a special trench for them in advance. The average and optimal depth of the trench should not exceed 80 centimeters. Launching the cable through the air is not recommended for safety reasons. About, how to lay a cable in the ground, we told in the corresponding article.

Also, in order to assemble a safe street lamp, it is recommended to use a corrugation for cable. Threading wiring in such a sleeve should be done before laying it in the ground. About, how to pull the cable through the corrugation quickly and correctly, read in our publication.
When installing the lighting device on a wall or facade, the connection to the electrical network is as follows: the first thing to do is to isolate the contacts. Then we bring the wires for connection to the junction box. It is also advisable to do the following: solder the contacts together and wrap them with electrical tape. The connection point in this case can serve as a conventional outlet. But there is such an option as connecting the cable directly to the terminals in the shield. The last step is to install the lamp. For street lighting, it is best to use LED lampbecause they shine brightly and at the same time the most economical.
To pay less for light, you can additionally equip your home-made street lamp with a motion sensor and a photo relay. About motion sensor connection, in fact, like about photocell connection, we described in separate articles, which we strongly recommend that you read.

As you can see, making a street lamp with your own hands is quick and easy. The main thing is to have a great desire, desire and, of course, the material necessary for work. This type of lighting for the street is considered safer, since its body is completely closed.
Master classes
Well, the last thing I would like to provide to you is visual video instructions on how to make a street lamp from metal, wood and even a glass jar. You can see all the simplest master classes below:
That's all I wanted to tell you about how to make a street lamp with your own hands. We hope that our instructions were interesting for you and helped in assembling your own garden lamp!
It will be useful to read: