Correct Tinning Technology
Why is this so important?
The fact is that in air, copper can oxidize, which often leads to poor contact between the wires. In the future, poor contact begins to heat up and, as a result, a fire in the wiring can occur. To prevent this from happening and soldering electrical wires It was durable, reliable and safe; it was necessary to tin the stripped ends of the cores with the help of lead-tin solder.
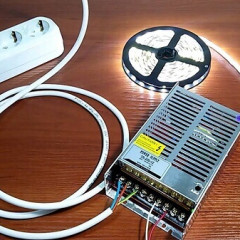
In addition, tinning is used during soldering, for example, when connecting led strip to the power supply. If the strands of the LED strip are not irradiated, the soldering place will be unreliable and it is possible that the wiring will fall off over time.
Step-by-step instruction
So, to make it clear to you how to properly wire the wires, we provide step-by-step instructions in the pictures:
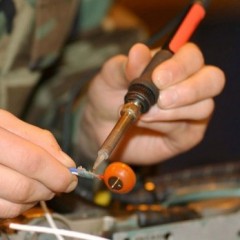
- Prepare the right tool: a sharp knife, tweezers or pliers, a soldering iron, solder and flux (in our case rosin).
- Remove the PVC insulation from the conductor. For this, it is best to use stripping toolbut if there isn’t one, a knife will help. Strip the insulating layer 10-20 mm.
- Gently, using the same knife, strip the core to a metallic luster. If the wire you need to tin is stranded, fluff all the wires and carefully strip them with a knife.
- Connect the soldering iron to the network and wait until it heats up. By the way, before tinning, you need to clean the soldering iron tip from debris and old solder. To do this, we recommend using a file.
- Slide a heated sting along the tip of the wire you are about to tin.
- Touch the soldering iron tip to the rosin, and then immediately to the solder. The working surface of the soldering iron should be evenly covered with tin.

- Touch a sting to a copper wire. The solder should be evenly distributed over the copper conductor. For better tinning, we recommend taking the conductor with a pair of pliers or tweezers, and then tinning the tip from all sides, independently rolling the wire.
- Visually see how well you managed to tear the cable. The photo below is an example of a job well done. If not all solder surface is covered, repeat steps 6 and 7.

In this way, you can quickly and efficiently tin wires at home. We draw your attention to the fact that tinning of thin wires from headphones (or a microphone) needs to be done a little differently. Since the wires are enamelled (varnished), you must first carefully clean the enamel with a sharp knife.After this, it is already necessary to tin with a soldering iron.
Video tutorials on the topic:
You can tin-wire without rosin - using special soldering acid. In this case, you first need to treat the work surfaces (the tip and the tip of the wiring) with a brush dipped in acid, and then apply solder. Both methods can be used without fear for the quality of the future connection. As for the thick wire, it is easier to irradiate it than a very thin one. A little skill and even less time will be required, the main thing - do not forget to clean the surface of the vein with a knife.
Here, using such a simple technology, you can do it yourself with a soldering iron. We hope that now you know how to tin wire and what it is for. If at some point you did not understand, we recommend that you look at the visual video instruction or ask a question in the comments!
Be sure to read:


thank