How to drive light into the garage - instructions from A to Z
Installation includes several main stages:
- determination of places where it is necessary to install lamps;
- selection of light sources (bulbs);
- selection of the fixtures themselves and calculation of their quantity;
- creating a schema;
- electrical work (installation according to the created project).
So, we will consider in detail each of the stages.
Functional Zone Definition
The garage is primarily used for repair, storage and maintenance of the car, so during wiring installation care must be taken to ensure that all conditions for placing the machine are met.
The following zones are mandatory:
- the area of the whole room;
- viewing hole (car repair place);
- a table with tools and an area above the workbench (if any).
In addition, it is recommended to acquire a portable lamp with which it will be possible to illuminate hard-to-reach places under the hood of the car and in its trunk! The design of the lamp must be made so that it can be used for hanging.
The choice of light sources
In order to carry out lighting in the garage, you can use the following lamp options:
- incandescent lamps;
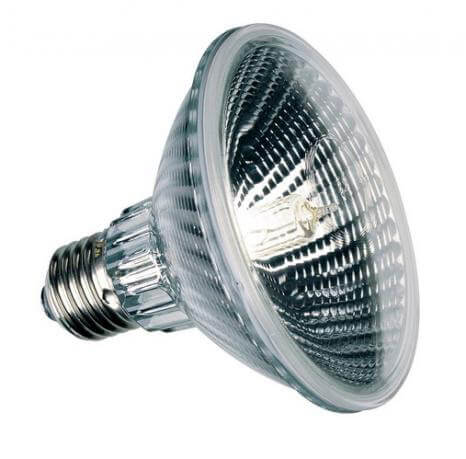
- halogen;
- luminescent;
- LED light.
Consider the advantages and disadvantages of all products.
Incandescent lamps
Incandescent lamps are the cheapest source of light, which is the main advantage of these products.

Among the disadvantages, the most significant are:
- low efficiency;
- high energy consumption (due to the fact that most of the light goes into heat);
- short service life;
- weak light output (eyes quickly get tired);
- fire hazardous products (a spark occurs during burnout).
Bottom line - these bulbs are used only because they are cheap. You need to purchase them only as a last resort.
Halogen
This type of product is also very often used when installing lighting in a garage.
Benefits:
- good luminous flux;
- higher efficiency (compared to Illich lamps);
- long service life;
- save energy.
Disadvantage — They work poorly with power surges (therefore they require a stabilizer)
The result - if there are no voltage drops in the network, then these products are quite advisable to purchase and install. Otherwise, you have to install surge protection.
Fluorescent
These lamps are a worthy alternative to halogen products. Their service life is slightly higher, in fact, like light output.

The only drawback that affects whether or not to buy fluorescent lamps - temperature in the room (if it is heated, there are no problems). When the temperature drops to 5 degrees (or lower), the lamps stop working, so their installation in an unheated room is not recommended.
As well as for the previous version, power surges adversely affect the performance of products. If you want to make your own lighting in the garage using fluorescent lamps, connect a voltage regulator to the mains!
LED
This is the most modern and effective option, especially for installing lighting in a garage.
Advantage:
- highest energy-saving properties;
- high light output;
- maximum fire safety;
- operating life of more than 50 thousand hours (an order of magnitude higher than other light sources);
- can work normally with voltage drops.
Only flaw - high price. For an apartment, this drawback disappears due to a number of advantages. If you decide to make the light in the garage with your own hands, then it’s your business: to install fluorescent or LED lamp.
Choice of fixtures
So, now, in order, we will consider tips on what type of fixtures you need to choose for lighting each of these zones.
In order to make light in the garage over the entire area of the room, it is recommended to use ceiling fluorescent lamps. The main thing is to take into account the requirements for their use (we talked about this above). If the thickness of the wallet allows, then it will be more reasonable install spotlights, which will qualitatively illuminate the entire room.

As illumination of the inspection pit of the garage, it is necessary to use special low-voltage lamps (12-volt). This need is due to the fact that the pit is a zone of high humidity, in which there must be a safe current. To convert a 220 volt network to 12, you should purchase an ITP (box with a step-down transformer), which can be installed directly inside the inspection hole. In addition to this, we recommend additional protection against mechanical damage for fixtures by equipping them with shades and a metal grill, as shown in the photo.

In order to make the lighting in the garage above the table, it is best to connect a regular table lamp. There are no special requirements for it, the main thing is that the luminaries are good.

As a mobile lamp, it is recommended to use a conventional incandescent lamp with a reflector and a hook that can be hooked on the hood of the car during repair work.

We decided on the choice of fixtures. In order to calculate their exact number, it is recommended to familiarize yourself with the detailed technology provided in the article: installation of lighting in the apartment.
Settlement part
After you decide which bulbs and fixtures will be installed, you need to go to the calculations of their power and quantity.
As for power, everything is simple. It is believed that it is necessary to install a product with a power of 15 to 20 watts per square meter of space. For example, if the garage has an area of 20 squares, then the total lighting power should be from 300 to 400 watts. Next, you need to choose the right number of light sources, which you need to dwell on.
- If you decide to make light using incandescent lamps, then the result must be evenly distributed over the number of products. In this case, 5 bulbs of 60 watts are suitable.
- If the choice is stopped on energy-saving lamps, the result is first divided by 5, and then distributed to an integer number of light sources.
- When using halogens, the calculation is similar to the previous one, only the coefficient is accepted not “5”, but “6”.
It should also be noted that this method of calculating the lighting in the garage is recommended if the room has 2.5-meter ceilings.For 3-meter ceilings, the total power must be increased one and a half times. In our case, instead of 300-400 there will be 450-600 watts.
We draw your attention to the fact that on the Internet today there are many online programs in which you can quickly, and most importantly, accurately calculate the number and power of lamps for lighting the garage. As for the wiring for fixtures, in order to choose the most suitable diameter of the core, it is necessary to cable section calculation do it yourself. Do not forget to also determine the appropriate kind of light switchso that it is practical, safe and at the same time does not spoil the interior.
Schema creation
In order to make a lighting scheme in the garage, it is recommended to use a photocopy of the construction plan, as In this document all dimensions of the room are observed. The diagram shows the installation location of switches, lamps, sockets and other elements of the wiring.
We bring to your attention a visual scheme of garage lighting:

It should be noted that we carefully considered this project when we talked about wiring diagram in the garage!
Electrical Requirements
We will not talk about exactly how you need to put light into the garage, because We described this technology in detail in an article that was referred to at the very beginning.
The only thing I would like to talk about is the requirements for installation work:
- The artificial lighting of the garage should not burden the eyesight of a person. Moreover, the conditions must be comfortable for repair work. That is why light must be scattered to every corner of the room.
- The scattering of light should be uniform, so each bulb must fit into the ceiling. In addition, it is forbidden to install a light bulb without a shade, because it will "hit in the eye."
- Correctly place lamps around the perimeter of the room. Even in the inspection pit, the products must be installed on both sides. The general lighting of the garage can be arranged both on the ceiling and on the walls, the main thing is that the whole area is highlighted.
- Take care of energy saving. It is better to spend money on expensive but economical bulbs once than to overpay on an electricity bill each time.
- Wiring safety comes first. We have already said that it is necessary to install moisture-proof products with a safe current. Another important nuance concerns wire connection method and cable routing. It is recommended to connect the cores with the wagon terminals, twisting, which is often used, is extremely prohibited. The cable laying must be carried out in an open way in the cable channels, so that the wiring repair is carried out quickly, and in case of malfunctions this could be noticed in time by the appearance of the products.
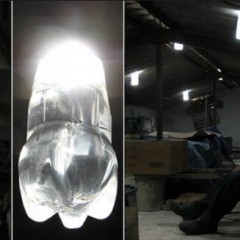
I would also like to advise you to familiarize yourself with the article, which describes how to make light in the garage without electricity. Material Link:https://my.electricianexp.com/en/avtonomnoe-osveshhenie-garazha.html
That's all I wanted to tell you about how to make lighting in the garage with your own hands. We also recommend watching this video clip, which details some features of the choice of fixtures, as well as the electrical work itself:
Also read: