We make LED illumination of shelves in the cabinet
Before proceeding to the instructions with photos and video examples, I immediately wanted to draw your attention to the fact that we will not consider options with installation of spotlights and halogen lamps. This is due to the fact that you can do the lighting in the cabinet with your own hands faster and without damaging the shelves, if you glue the LED tape in the right places. This installation option will be more reasonable and safe. Next, we will look at step-by-step instructions with photos and video examples that will clearly show you how to mount the LED illumination of shelves in a clothing, kitchen and even a bookcase!
Step 1 - Preparing for installation
So, before you start creating your own LED cabinet lighting, you need to consider several important points:
- Where will the diodes be most effective for lighting the shelves, and at the same time they will not create inconvenience?
- How will the lights turn on / off and where will the light switch be located?
- How will the LED backlight be connected to a 220 volt home network?
We recommend placing the LED strip over the shelves as shown in the photo below. With this arrangement, the diodes are least susceptible to mechanical damage and, moreover, the illuminated area will be well covered by the backlight.

As for the light switch, it can be neatly placed under one of the shelves or displayed on the outer side wall of the cabinet. You can also make automatic illumination of the sliding wardrobe - so that the LED strip turns on when the door is opened. There are already ready-made sets of fixtures equipped with special motion sensors that respond only to opening the door. In our example, another alternative will be considered - the installation of limit switches, which will turn off the lighting in the closet when the door is completely closed.
Well, the last question is the connection option. Since the LED strip works from 12 Volts, it needs to be connected to the power supply. The latter, in turn, is plugged in, but you can also bring out a separate cable for lighting the shelves in the cabinet. In this case, it is recommended conduct open wiring on the ceiling and wall to the installation site of the cabinet. Having solved all the preparatory questions, you can sketch the lighting scheme, buy all the necessary materials and proceed to the creation of LED backlighting.

Step 2 - The Main Process
To make it more clear to you how to make the lighting in the cabinet yourself, we will provide step-by-step instructions with photo examples of each installation stage:
- Measure the required tape length and cut a suitable piece. Do not forget that cut led strip permitted only in designated areas as shown in the picture below.


- In the place of installation of the LEDs, fix the plastic corner 10 * 10 mm. Use it to make hidden backlightso that the tape does not spoil the general view of the shelves.

- To lead the cable into the closet, make a hole in the most inconspicuous and convenient place with the help of a special crown. An important point is that the chipboard sheet does not tear out, and the contours of the hole are smooth, first drill a hole with a crown no more than 5 millimeters deep, and then drill the input from the back.


- If you decide to highlight all the shelves inside the cabinet, be sure to drill small holes in the corner, as shown in the photo below. This is necessary so that you can run the cable to the very top.

- Pull the wire and hide it in special cable channels, which are best fixed to liquid nails.


- Pour diode tape around the corner and connect to the power supply. About, how to connect the LED strip to the network, we already told.

- Set the limit switches yourself in the appropriate places, connect them to the backlight and check if the lighting you created works.


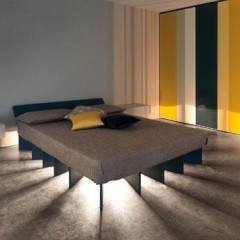
That's the whole installation manual. As you can see, it is not at all difficult to make the illumination of the shelves inside the sliding door wardrobe, and in addition, a diode strip in this case will be the best option for the lamp. By the way, if you want to organize this type of lighting in a kitchen or bookcase, or on a shelf under a mirror in the bathroom, then in this case the tape can be glued to the end of the shelves, which will create a more original appearance of the furniture. Glass shelves in this case will look something like in the photo:

We also recommend that you watch the video examples that will clearly show how to make the lighting in the cabinet with your own hands:
Similar materials: